Design Space & Inkscape: Let's Doodle!

Being vulnerable here... I am not an expert at free-hand doodling. I make mistakes and I don't typically love what I draw (& what's worse for someone who is OCD like me, is that I can't replicate a hand drawing on multiple cards!). Add Inkscape & the Explore and all of these issues evaporate.
That being said, I love the whimsical & exotic aesthetic of doodles and mandala type artwork. It's fun to watercolor and it makes really pretty details for cards. It can also be embossed for even greater wow factor!
This is not a "trace bitmap" type of tutorial. I will be showing you how to go a little deeper into the tools you have available with Inkscape and you will be drawing these doodles "freehand". In that regard this is probably an "intermediate" tutorial. If you're game, stick with me and we can draw something amazing - it's not as scary as it sounds.
Ready, Set, Doodle!


[Compensated
links to supplies, and affiliate advertisements shown inline and in the
sidebar of this post are provided at no cost to you]
1. First, grab a pen (or Cricut Marker!) and some paper & brainstorm your Doodle.
You need to get familiar with the style of artwork and decide what you are going to try to draw. I would start by doing a web search for inspiration, but please don't steal the artwork of others!Once you have an idea of what you want to draw sketch it out on paper first. This is what I came up with.

It's ok, but I wouldn't slap it on a greeting card - so lets make it in Inkscape.
2. Open up Inkscape
If you haven't already done so, it would be a good starting place to read my other blog article:
It walks you through some basic document setup that will help later when you bring your doodles into Design Space.
Go ahead and set your drawing size to 11.5 x 5.75 inches.
Go ahead and set your drawing size to 11.5 x 5.75 inches.

3. Grab your spiral tool (F9)
Draw a spiral about 1/2" high. Inkscape lets you modify the "turns" or how many times your spiral loops around. You can play with the "divergence" setting too if you want. I left mine at 1.

4. Turn the spiral into a path (Shift+Ctrl+C)
Design Space doesn't really like Inkscape "Objects" so any time we create an object, we need to turn it into a path before we import to Design Space. Also, I want to adjust the end of the spiral so it connects to itself. To do this, select your spiral and hit Shift+Ctrl+C or select "Object to Path" from the Path toolbar. Once you turn the object into a path, adjust the nodes on the spiral so that the end touches the spiral. (look at the nodes by double clicking the object)


5. Create a leaf with the Bezier line tool
Using the Bezier line tool, create an upside down V shape. Make sure your nodes are set to "corner" and adjust the grips on each node to shape the leaf the way you want.


6. Copy, Paste!
Create the inset of the leaf shape by copying the leaf shape you just created. Resize it to fit inside the outer leaf shape.

7. Fill it in
Fill in your leaf shape with some hatch marks by creating four lines with the Bezier tool.

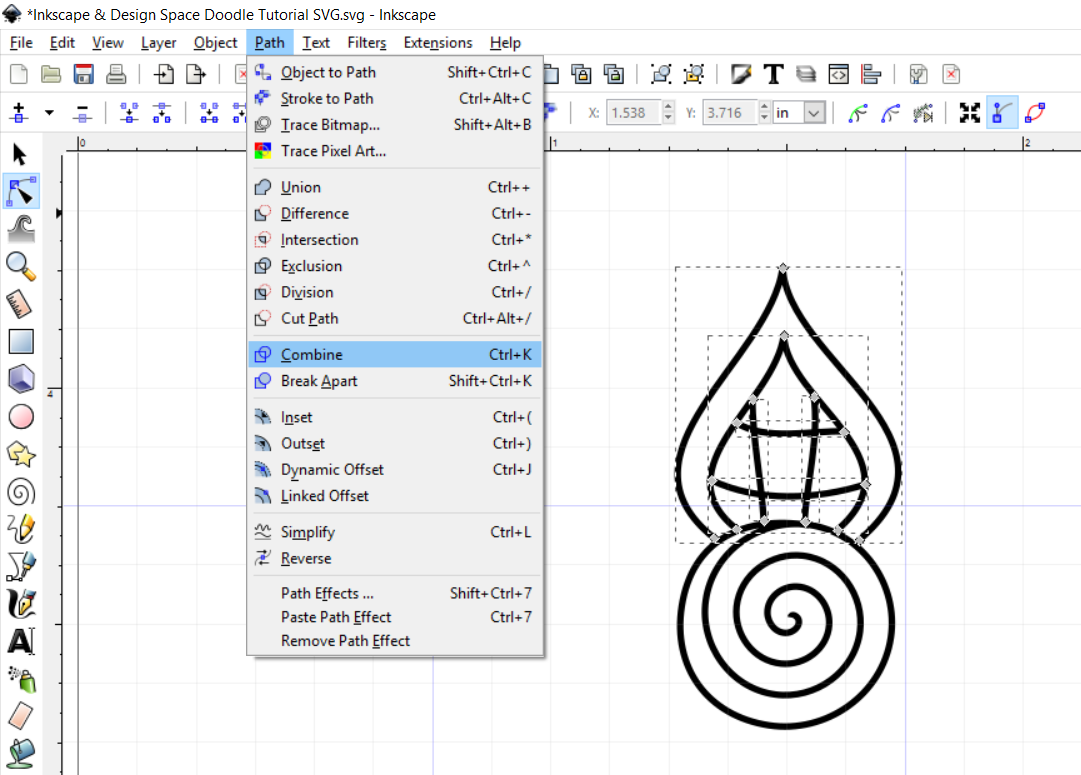
8. Combine lines (Ctrl+K)
Select all of the lines that make up your leaf shape and combine them by hitting Ctrl+K.
9. Duplicate leaves
Select the leaf and copy, rotate, & resize unit the spiral is surrounded by leaves.

10. Embellish with circles (F5)
Grab your circle tool and add some little circles to the edge of your flower. Be aware that circles are objects - so when you have them where you like, select them all and combine them (Ctrl+K like we did in step 8). This will serve two purposes - combining them and converting the objects to paths. (Yay! Two for one!)

11. Duplicate circles
Like we did with the leaves, copy your little group of circles and copy / rotate / resize them unit all of the leaves are decorated.

12. Add the Stem and Branches (and some grass)
Honestly, we could stop here. This is pretty cute.. but lets go ahead and add a stem and some branches.
Using your bezier tool again, - draw in a stem & some branches and adjust the grips unit they bend the way you want. While you're at it, add in some lines for the grass.

13. Embellish the branches and grass
I added some little circles to the ends of my branches and ovals (using the circle tool) to the ends of my grass stems to embellish them.

14. Add another flower
I created a second flower using the techniques we used on the first flower, but this time I made the flower look more like a bud.

14. Combine everything
Select everything you have drawn and combine it (Ctrl+K). This will allow it to come into Design Space as a single graphic so you don't have to mess with a million layers.

14. Clean up any stray nodes and resize your image by 80%
Double click on your finished image and check for anything out of place. I didn't like those three circles at the base of my flower because they were interfering with the stem. I also corrected some places where lines didn't join up where I wanted them to. This is the "its an art" part of the process. Just mess with nodes and grips until you like what you see.
Once you are done, select your flower, lock the aspect ratio and resize it by 80% like I explained in my Design Space and Inkscape: Why an inch isn't an inch & how to fix it! tutorial. You can now bring your awesome Doodle into Design Space!

Remember - we drew this in single line, so the image is meant to be used with the Cricut's "write" feature. You cannot cut it. When you bring it in to Design Space, it will look a little crazy until you set it to write.
I will be adding a tutorial soon that will show you how to add a shadow layer to your flower so that you can cut it out (kind of like a coordinating stamp and die set) so stay tuned!
I hope you enjoyed this tutorial!
If you like doodles, but this feels too advanced or you would prefer someone else to do the grunt work for you, you can stop by my Etsy shop and pick up my pre-made set of Botanical Doodles!

If you like doodles, but this feels too advanced or you would prefer someone else to do the grunt work for you, you can stop by my Etsy shop and pick up my pre-made set of Botanical Doodles!

Thank you SO much for this!!!
ReplyDeleteThanks for stopping by Susan!
DeleteHello, can you explain the nodes bit a bit further. I understand nodes and that you can move them to change the shape, move the circles to change the curves etc. But every time I try to close my spiral it doesn't go nice and smooth like yours, it doesn't form a circle. Thanks
ReplyDeleteBekkazaleien, when you move the node at the end of the spiral, attached to the node you should see a blue line with a little circle on the end . If you grab that circle you can move it around and it will adjust the curve of that line segment. Hope that helps.
DeleteThank you! You are very much appreciated!
ReplyDeleteThank you Tereasa! I appreciate you reading!
Delete